Archive | Main Course RSS feed for this section

Browned Butter Squash Noodles with Lemon Basil Pasta and Chicken

24 Jun


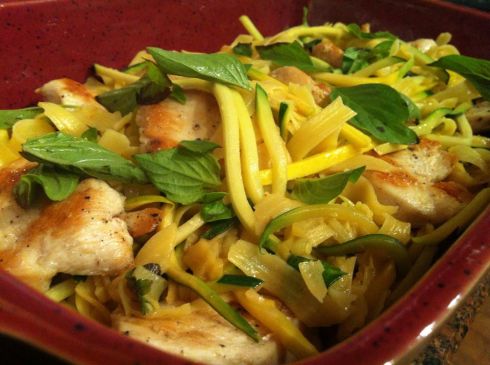
Browned butter squash noodles with fettuccine, lemon thyme and chicken.

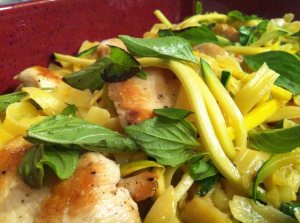
Browned butter squash noodles with fettuccine, lemon basil and chicken.

As mentioned previously, I visited the Bernice Garden Farmers’ Market on Sunday to load up on veggies. One of my wonderful finds was a huge load of Zephyr and zucchini squash from Hardin Farms.

I’ve used them a few ways already, but I think tonight’s dinner gets a special mention.

First, I cooked some gluten-free fettuccine noodles (Le Veneziane, the only kind worth using in this), just three of the six nests in a package, to al dente in salted water. I held it in a colander in the sink, tossed with a bit of olive oil, until everything else was ready.

Results of the amazing DeBuyer mandoline. Not sponsored, just true.

Results of the amazing DeBuyer mandoline. Not sponsored, just true.

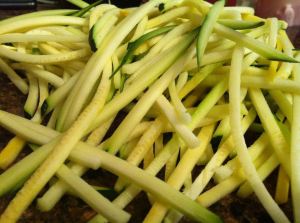
I’ve had my trusty DeBuyer mandoline for years, but I’d never used it to make veggie noodles. Before I ran out to buy one of those fancy noodles machines I’ve seen lately, I decided to give it a shot. Using just the right combination of the two reversible blades, I got these babies. Amazing, crunchy, long squash noodles. I ate a quarter of them before I ever got around to cooking them or anything else. I used three largish squash, finding that the larger ones are easier to run across the mandoline.

I will tell you this: real French mandolines work great, but they often collect a penance in the form of a piece of your finger. Be wary. I even had to skip the safety shield and pusher so I could shove the whole squashes across. If you do that…may the force be with you.

Chicken cooking in the incredibly not non-stick pan

Chicken cooking in the incredibly not non-stick pan

I had a couple large chicken breasts in the freezer, so I thawed them in the fridge overnight. I sliced them into 3/4-inch slices, seasoned with salt and pepper, and tossed them with a bit of olive oil. Then I seared the slices in a large, stainless steel (as in not-nonstick) pan and cooked until they were just done, turning once. They may stick a bit, but they should turn just fine when they’re properly seared. I moved the finished pieces out of the pan and into a separate dish, covered with foil, while I did a second round. Two chicken breasts made plenty for four people!

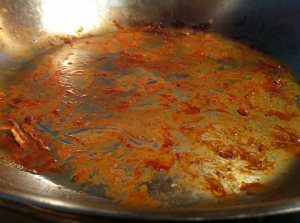
Are you cooking along? Oh, good! DO NOT clean your pan. All those brown bits are about to make this dish amazing.

This stuff is gold, people. If you scrub it off, we can't be friends.

This stuff is gold, people. If you scrub it off, we can’t be friends.

I added a tablespoon (ahem, or more) of butter and cooked it until browned, which didn’t take long since it picked up some of the pan’s yummy goodness. Then I put in a half-cup or so of chicken broth to fully deglaze the pan (fancy terms for picking up all those yummy bits), whisking the whole time to scrape them up. The squash noodles went in next, tossed a bit with tongs. Then I added the GF noodles and half of my fresh lemon basil, tossing a bit over the heat. You can add the chicken back at this point if it needs reheating.

The whole shebang now went into a serving dish, with the chicken (if you didn’t add it earlier) and the rest of the lemon basil. Top each serving with a bit of fancy salt, if you have it.

squash noodle close

I’m not writing this one out recipe style, so if you have any further questions, just leave a comment below!
Poblano Quinoa Cucumber Bites with Cumin Vinaigrette

2 Mar
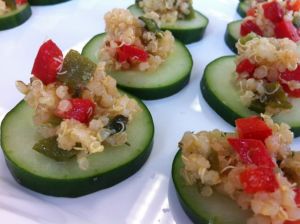
Attendees at the North Little Rock Vitamin Shoppe's Share the Health event loved these Poblano Quinoa Cucumber Bites with Cumin Vinaigrette

Attendees at the North Little Rock Vitamin Shoppe’s Share the Health event loved these Poblano Quinoa Cucumber Bites with Cumin Vinaigrette.

An aside…

This title reminds me of a silly page I want to do someday on this website. I want to have a “fancy food name generator.” It will have a series of food words that go something like this: adjective noun noun noun with a(n) adjective noun noun. Refresh the page and you’ll get something like this:

Crispy Tomato Kumquat Compote with a Creamy Asparagus Sorbet
or
Savory Watermelon Kimchi Pizza with a Chilled Habañero Reduction

Anyways.

This weekend I participated in the national “Share the Health” expo held at Vitamin Shoppes nationwide, setting up camp at my local store in North Little Rock. While others demonstrated taekwondo and sold bikes, I whipped up samples of this tasty quinoa salad. Even the healthy-food averse were converted. Hallelujah!

I served the salad cold atop tiny rounds of fresh cucumber, but it could be served as a meal component or salad all by itself, warm or chilled.

Here’s the recipe, as promised to those in attendance. I think you’ll love it!

***************

Poblano Quinoa Cucumber Bites with Cumin Vinaigrette
Serves 30 as an appetizer, 8 as a main dish or salad

  • 1 cup quinoa, uncooked
  • 2 cups chicken or vegetable broth
  • 1 garlic clove, peeled and smashed
  • 2 Poblano peppers
  • 1 Red bell pepper
  • 1/2 cup olive oil
  • 1/4 cup apple cider vinegar
  • 2 tsp. Dijon mustard
  • 1/4 tsp. dried thyme
  • 1/4 tsp. dried oregano
  • 2 T. dried parsley (or 1/4 c. fresh parsley or cilantro, chopped fine)
  • 2 tsp. ground cumin, plus extra for garnish
  • Kosher salt and fresh ground pepper to taste
  • 2 cucumbers
  • Optional: Fresh parsley or cilantro for garnish

If the package states to do so, rinse and drain the quinoa. In a medium pot, heat the quinoa by itself over medium-high heat a minute or two, stirring occasionally, until slightly toasted, then add the broth and the garlic clove. Bring just to a boil, then reduce the heat to a simmer and cover. Cook according to package directions, probably about 15 minutes, until the quinoa is done and all the liquid is absorbed.

Meanwhile, roast the poblano peppers. If you have a gas cooktop, this can be done there. Place one or both peppers directly on a burner and turn on the flame. When one side is charred, turn carefully with heat-resistant tongs. (Turn on the vent if you have one!) If you do not have a gas cooktop, you can do this under the broiler of your oven. Place the peppers on a baking sheet just under the broiler. Stand nearby and watch, turning with tongs when the top is charred. With either method, when all sides are charred, place the peppers in an airtight container such as a plastic storage bag or rigid container with a lid. Allow the peppers to steam while you continue.

Chop the bell pepper, which we’ll use raw, into small dice. You can do this by cutting the pepper in half, carefully removing the white membranes and seeds with the tip of your knife, and slicing the pepper halves into very thin strips, about 1/8″ thick. Line the strips up and cut into small cubes.  Place in a large bowl.

By now your poblanos are ready to peel. Hold them under running cool water and scrub off the charred skin. If some skin wasn’t charred and doesn’t want to come off, don’t worry about it. Now dry the poblanos and cut the flesh into small pieces with the same method as the bell pepper. (Yeah, it will be more floppy, but it’s floppy deliciousness.) Add to the large bowl.

In a jar, add together the olive oil, apple cider vinegar, Dijon mustard, herbs and cumin. Shake to combine, taste and add salt and pepper to taste. Keep it in the jar for now.

When the quinoa is done and still warm, turn it out into the large bowl and gently mix it with the peppers, being careful to not crush the quinoa. Pour the vinaigrette over the mixture and fold it in gently. If possible, let this stand, covered, in the fridge for at least 4 hours before using.

When you’re ready to serve, slice the cucumbers about 1/4″ thick. Sprinkle sparingly with kosher salt. (Skip the salt here if these will sit out a while, or they’ll weep.) Find the garlic in the salad and remove it. Using a small spoon or melon baller, place a small amount of the salad on top of the slices. Sprinkle with another bit of kosher salt and a dash of cumin. Add a small sprig of parsley or cilantro if you like.

Prettied-up option that I skipped during my show: Before slicing the cucumber, use a vegetable peeler to make four or five stripes evenly around it. When you cut the slices, they’ll have a cool pattern and they’ll be easier to eat if the peel is tough.

******************

I so enjoyed making new friends at this show, especially those of you who had questions about how food changes can affect your health. I hope I can be of service to you. Stay in touch!

Gluten Free Chicken Pot Pie Class at PTC March 22

14 Feb
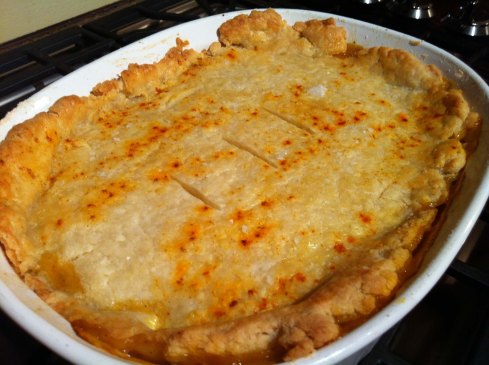
gluten free chicken pot pie

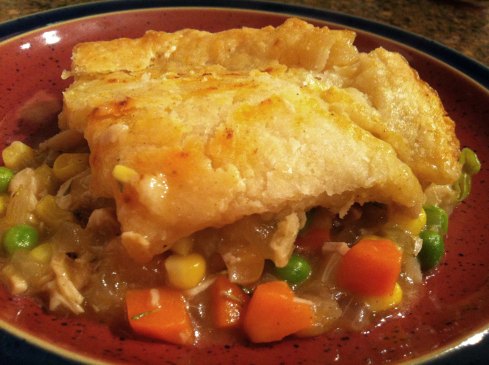
Amazeballs gluten free chicken pot pie, if I do say so myself. Learn to make your own at my class!

I had a lot to do last night.

Pinterest-y Valentines for the Kindergartener’s friends. A not-so-Pinterest-y Beyblade Valentine mailbox for same Kindergartener. Spray-painting elements for said box outside. Realizing that wasn’t going to work and going out for red plastic plates. Baths. Homework. All that momma stuff.

For some unknown reason, I decided it would be a dandy night to make chicken pot pie from scratch. Well, sorta from scratch; my mom brought a rotisserie chicken over at lunch, and the leftovers pretty much demanded to be pot pie. They told me so.

It’s just as well, since I’m teaching a class next month at Pulaski Technical College’s Culinary Arts and Hospitality Management Institute on this very dish. Why not practice a few times? Yum.

The whole pot pie. In class, we'll probably make individual-sized ones. Equally delicious.

The whole pot pie. In class, we’ll probably make individual-sized ones. Equally delicious.

Last night’s version used (gasp) frozen veggies, just because it’s what I had and I forgot to go to Kroger. Sue me. (In class, we’ll bust out our real knife skills on real-life veggies. Because you need the practice.) Well, I did dice a real onion and some garlic, so there’s that.

Want to make your own? Of course you do. This dish was amazing, even with cheater ingredients. We’ll go over how to mix your own gluten-free all-purpose flour (and save a ton of cash) in our class. I’ll teach you how to make flaky pie crust that nobody will know is gluten-free, even your picky gluten-eating family. And we’ll package them up to freeze and bake whenever the pot pie siren calls. (Or, you can bring it home for dinner that night.)

The class is $75 for four hours of instruction and lots of tomfoolery. But productive tomfoolery. Let’s just say we’ll have fun.

Sign up for this class by calling (501) 907-6670, ext. 3407 or emailing Emily Story, Director of Community Education at PTC. See you there!

Gluten Free Pot Pie Class
Pulaski Technical College Culinary Arts and Hospitality Management Institute
Community Kitchen
Saturday, March 22, 2014
12:30 – 4:30 p.m.
$75 per person

Panic and Gluten Free Turkey Potstickers

10 Feb
My glorious plate of too-few GF turkey potstickers.

My glorious plate of too-few GF turkey potstickers.

Most of the time, I don’t really mind being gluten-free.

I’ve gotten used to GF bread (don’t eat much anyways). I’m better off skipping the cupcakes and such at the bakery anyways (with a notable exception). But there are two siren calls that still wail to me: doughnuts and Asian dumplings.

Not much I can do about the doughnuts right now, but I saw a post recently on Brokea** Gourmet that rekindled my hankering for potstickers, the close cousin of traditional steamed dumplings.

I’d found myself on the aforementioned site because I’m bootstrapping a new spinoff business, one that you’ll hear all about very soon. Things are going well, but the fancy food budget has been, well, constrained. The recipe fit right in, using small amounts of inexpensive ground pork or turkey and some other bits that I mostly happened to have around.

I probably would have rather used pork, although I usually don’t eat much of the stuff, but my local Kroger didn’t have any ground pork on hand. I picked up the turkey instead, remembering that the recipe said it would be fine with the addition of an egg yolk for added moisture.

It took me a while to find the rice paper, but when I did, I realized what a great deal it was. For a little over $2, I had like a bazillion wrappers for my little packets of Asian awesome. I couldn’t wait.

I made the mistake of coming home to cook dinner right after a major shopping trip. Hungry. Panicked. Must. Have. Dumplings. NOOWWWW.

In a move of total desperation, I put the husband on rice duty. Just cook some white rice, sauté the veggies and throw them together, I said. He looked at me like I was speaking Korean. “You did cook before we got married, right?” More blank stare. He ended up doing pretty well, despite charring the zucchini a bit — the daughter asked how I made it because it was so good. Heh.

Meanwhile, I got after the cumbersome task of the dumplings. The filling was easy enough, if you’re comfy with your knife skills; just some mincing and a quick stir. The wrappers, however, were a little more tricky.

In this recipe, you wet two large pieces of rice paper and stick them together, then cut smaller circles out of that using a cup or small bowl as a guide. A little cumbersome and time-consuming, but I got one sheet done, resulting in four small circles. Yay! Oh wait…I want to make more than four dumplings. Fill those, struggle with sticky edges, smoosh closed however they’ll smoosh. Repeat. Cook those, and repeat again.

Since you really can’t cook more than eight at a time anyways, the process was very staggered. After the second batch of eight, I was done. I could have eaten twenty more of them, but I was tired of it. And hungry. Darned shopping!

Everything said, these were delicious. If I do it again (and I probably will), I’ll start early, when I’m NOT HUNGRY, and make a bazillion dumplings all at once. To do this, I’ll have to keep them on a non-stick surface, maybe a Silpat or wax paper, covered with a wet towel to keep the wet rice paper from drying out and getting crunchy. Doable.

Also, I think I’ll fry them a bit more on each side before the steaming step. The linked recipe didn’t suggest this, but the rice paper did often taste a bit gummy on the side that didn’t meet the pan directly. A bit of oil and a little flip before steaming wouldn’t kill anyone.

Now that this subject is broached, maybe I’ll try a more authentic pastry-style dumpling next time, like this one by Gluten Free on a Shoestring. Or, I’ll just make a bazillion of the rice paper ones.

Either way, honey, you’re on rice and veggie duty. Fair warning.

Holiday Leftover Meal Ideas: New Year’s Sticky Rice and New Year’s Blackeye Peas

31 Dec
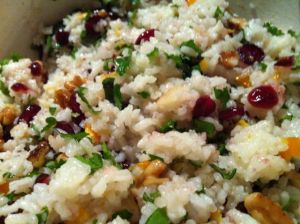
This decadent sticky rice is simple to make and easy to substitute with holiday leftovers.

This decadent sticky rice is simple to make and easy to substitute with holiday leftovers.

I opened my fridge this morning, and there it sat, taunting me.

The ham.

Ugh, I’m so tired of you. I had a bagel (GF, of course) instead.

But, before said ham is relegated to the freezer until I want it again, it’s going to have one more incarnation: New Year’s Blackeye Peas. It would have been even better with the bone, but my mom made the ham this year and kept that prize for herself.

You’re likely in the same boat, a fridge full of bits and pieces that need to get used or frozen pretty darn soon. Go ahead and do that; don’t be wasteful! Bag up and freeze what you can’t deal with, and make a few fabulous New Year’s dishes with what you can. I have a couple ideas that might help.

Leftover Nuts, Dried Fruit, Fresh Herbs

I discovered a quite lovely Christmas potluck dish a couple weeks ago when heading out to a party. This rice dish features walnuts, dried cranberries, fresh parsley and basil, which were beautiful and delicious in a red-and-green sort of way. I added orange marmalade to the original recipe for color, flavor and a bit of sticky-rice texture. I also toasted the walnuts, which you should totally do no matter what kind of nuts you use.

For New Year’s, just use whatever nuts and dried fruit you have left over. I’d say the parsley should stay, but also add some fresh basil if you have it. You might even experiment with the marmalade; I dare you to use the last of your holiday pepper jelly!

New Year’s Sticky Rice
(Modified from Parsley-Herb Rice with Cranberries recipe by Midwest Living)

  • 1/2 cup walnut pieces (pecans, almonds or pine nuts would work as well)
  • 1 1/2 cup long grain white rice, brown rice or wild rice blend (i.e. Lundberg brand; do not use anything with a seasoning packet!)
  • 3 cups water or chicken broth
  • 2 T. butter
  • 2 T. olive oil
  • 1/2 cup fresh Italian parsley, chopped
  • 2 T. fresh basil, chiffonade
  • 1/4 cup orange marmalade
  • 1/2 cup dried cranberries or other dried fruit, cut to similar size

In a skillet over medium-low heat, toast the nuts until just fragrant, stirring every so often so they don’t burn. Remove from the heat and set aside to cool.

In a medium saucepan, combine the rice, butter, oil and water or chicken broth and bring to a boil, cover and reduce heat to low. Cook until the rice is done (white rice should take 15-20 minutes, brown rice or wild rice blend closer to an hour). While the rice is cooking, prepare the parsley and basil and combine them in a small bowl in the fridge.

When the rice is done, turn it out onto a sheet pan and spread it out to cool slightly. This helps the rice maintain its structure and not get smashed when mixed with the other items.

When still just a bit warm, gently mix the rice in a large bowl with the marmalade and cranberries or other fruit. Just before serving, fold in the parsley, basil and nuts.

Best served at room temperature.

****************************************************

Ham and Ham Bone

Every year, my mom buys a ham for our traditional Christmas Eve dinner at her house. Every year, I ask the same question: Is it bone-in? Because I know, if it is, she’ll be making something like this come New Year’s Eve. I make it at my house, too…Good luck all around!

Since Mom kept the bone this year, mine won’t have the (cover your ears, vegans) unctuous, gelatinous awesome that comes from a long simmer with the porcine hip bone. But even with the ham scraps alone, this makes for a festive and relatively easy dish to ring in the year.

New Year’s Blackeye Peas

  • 1 pound dried blackeye peas (even better, order some cowpeas)
  • 1/2 lb. bacon, cut into small pieces
  • 2 T. butter
  • 1 large white onion, diced
  • 6 cloves garlic, minced or pressed
  • 4 stalks celery, diced
  • 1/2 lb. ham pieces, cut into small bites, with bone if you have one
  • 4 bay leaves
  • 2 quarts chicken broth or water (or enough to cover the peas and other stuff by 1 inch)
  • Salt and pepper to taste
  • Hot sauce to taste

The night before cooking, pick through the peas for rocks and such (I honestly very rarely do this, but they say you should…meh) and rinse in a colander. Place in a large bowl and cover with fresh water, and cover with a towel or plastic wrap. Let the peas soak overnight.

On cooking day, rinse the peas again in the colander to remove all the toxins that come out during soaking.

In a large skillet, cook the bacon until crisp. Remove the bacon to a separate bowl and drain all but a couple tablespoons of the grease. Add the butter, onion, garlic and celery and cook over medium heat a few minutes until softened.

Place the peas and all the skillet veggies into a large pot, along with the ham pieces and the bone if you have it. Add the bay leaves and cover everything with the chicken broth or water. Bring to a bare simmer and let it cook for one hour. Check the texture of the peas and see if they are soft; you can continue to cook them much longer if you like. (This part may be done up to 8 hours in a slow cooker on low.)

When the peas are tender to your liking, remove the bone and bay leaves. Smash about 1/4 cup of the peas against the side of the pot, or use an immersion blender (being careful not to puree too much) to thicken the liquid a bit. Season to taste with salt, pepper and a bit of hot sauce. Garnish with the reserved cooked bacon.

These peas are fabulous right away, but they’re even better after being cooled and reheated the next day.

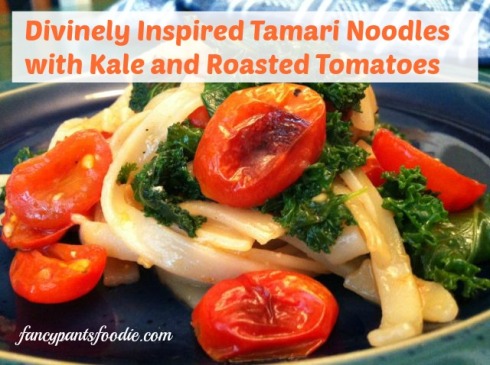
Divinely Inspired Tamari Noodles with Kale and Roasted Tomatoes

30 Sep

Noodles pinWell, divinely inspired might be a stretch, but…

My fellow church folk will know what I’m talking about. You know that last five minutes or so of service, when you’re trying really hard to pay attention and hear the last announcements and sing the last song, but your brain just goes LUNCH LUNCH LUNCH?

I kinda went there yesterday.

The noodles awaiting the chicken on the plate.

The noodles awaiting the chicken on the plate.

Here I was, sitting in the choir loft, truly paying attention but also brainstorming what I’d make once I got home. I must be a tad nutrient-deprived, because I was craving kale like a mad woman. Mmmmm, kale…

Before the last note, I had created this very dish in my head.

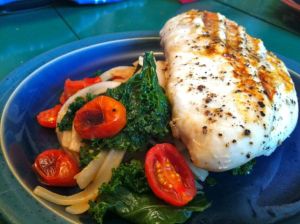
Just to make it more appealing to my carnivorous husband (and to continue to play with my new OptiGrill), I grilled some plain chicken breasts with it. Well, loaded with olive oil and kosher salt and freshly ground pepper that my husband did for me because I had one raw-chicken-hand and the pepper grinder is a two-handed operation. But still.

Chicken breasts on the OptiGrill. Delish, but I think I'll take them off a tad earlier next time.

Chicken breasts on the OptiGrill. Delish, but I think I’ll take them off a tad earlier next time.

You should make this. Really. Even if you’re not gluten-free.

If you want, you could use soba or buckwheat noodles, or even plain old fettuccine.

Tamari noodles and kale and a gratuitous slab of chicken.

Tamari noodles and kale and a gratuitous slab of chicken.

*************************

Divinely Inspired Tamari Noodles with Kale and Roasted Tomatoes
Serves 4-6

  • 4 oz. glass noodles (often labeled Pad Thai, rice stick or rice noodles)
  • 1 T. gluten-free tamari or soy sauce
  • 3 cloves garlic, minced
  • 3 T. olive oil, divided
  • 1 head kale, greens stripped from stalks and torn into bite size pieces, washed
  • 1 tsp. apple cider vinegar
  • 1/4 tsp. freshly grated nutmeg
  • 1/2 c. vegetable or chicken broth
  • 8 oz. grape or cherry tomatoes, halved
  • kosher salt and freshly ground black pepper
  • Toasted sesame seeds or crushed chia or flax seeds (optional, which means I ran out of time)

Turn on your oven to broil (500 degrees or so, a slower broil, if it gives you the option) so it’s ready for the tomatoes later.

Boil the noodles in salted water until al dente just as you would with regular pasta. (You may have to break them up a bit before putting them in the pan…do this inside a plastic bag to avoid shooting shards everywhere!) Drain and immediately place in a bowl or back in the pot and toss with tamari/soy while still hot. Cover the container while you work on other stuff.

In a large, high-sided sauté pan, heat one tablespoon of the olive oil over medium heat. Add the minced garlic and heat until the garlic is fragrant, no more than a minute or so. Add the kale pieces right on top of the garlic. Don’t worry about drying the kale; the water will help wilt it with steam. And also don’t freak out if it towers higher than your pan; it will cook down quickly. Stir and turn the greens occasionally to help them cook evenly and to move the garlic around so it won’t burn.

When the kale is wilted but not completely soft and turns a bright green (or sooner if the garlic starts to burn), add the broth and stir a bit. Add the vinegar and nutmeg, plus a sprinkle of kosher salt to soften things up, stir again, cover the pan. Turn down the heat to low.

On a sheet pan, toss the halved tomatoes with the remaining olive oil, along with a good sprinkling of kosher salt and freshly ground pepper. Place in the broiler for 5-10 minutes, depending on your oven and the rack’s proximity to the element. Just keep an eye on it, will ya?

Use this 5-10 minutes to deal with other parts of the meal (such as the chicken), get your kids off their butts to prepare their own drinks, or generally look busy in the kitchen until it’s time to plate this up.

When the tomatoes are slightly browned, blistered and awesome, remove from the oven.

Place the tamari noodles right into the pan with the kale, which should be gloriously wilted by now. Add a bit more broth to loosen up the noodles if they stick together. Turn the heat back up a bit, toss the stuff together. Add the tomatoes. Taste. Season as needed.

Put it on the plate, sprinkle on the seeds if you had more time to deal than I did, and feel like a bohemian kale-eating rock star. Or hungry choir girl.

Either way.

Recipe from Good Morning Arkansas: Marinated Steak with Chimichurri

24 Sep

Disclaimer: This post and today’s appearance on Good Morning Arkansas are sponsored by T-fal, for which I received compensation. Just as with everything else, I wouldn’t take their money or stuff if I didn’t love their stuff. I hope you like it as much as I do. 

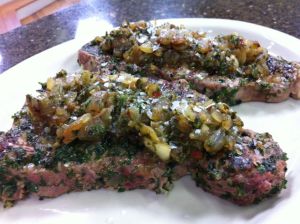
The finished steak as it appeared this morning on Good Morning Arkansas. I shouldn't have heated the topping...it's less pretty than it was.

The finished steak as it appeared this morning on Good Morning Arkansas. I shouldn’t have heated the topping…it’s less pretty than it was.

Hey y’all!

So, I guess you saw me on Good Morning Arkansas. Or maybe you didn’t. Either way, I’m glad you’re here, and I hope I didn’t say anything stupid. Live television, it has no mercy.

I demonstrated a recipe that Chef Marc Forgione (yeah, the Next Iron Chef dude) developed for T-fal, a marinated steak with chimichurri. They shared that recipe with me to try out on the T-fal OptiGrill on teevee, and now I can share it with you.

The original recipe called for Hanger Steak, which wasn’t available during my omigosh-I’m-on-TV-tomorrow-need-steak-right-now grocery run yesterday. It’s a lovely cut, though, so if you can find it, by all means, pick it up. You can use any steak, though, and I used a boneless sirloin strip.

Although I was skeptical, I was really impressed with the OptiGrill. It automatically senses the thickness of the product you’re cooking, then heats appropriately to reach the doneness level you want. My test steak came out a perfect medium, and the onions grilled beautifully.

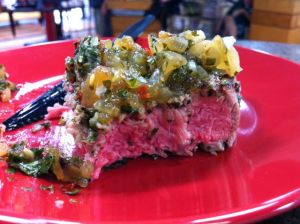
Closeup of KATV weatherdude Todd Yakobian's steak, just to show how perfectly medium it is. Yay!

Closeup of KATV weatherdude Todd Yakobian’s steak, just to show how perfectly medium it is. Yay!

So, for those of you who heard about our fancy-shmancy outdoor grill practically exploding a couple weeks ago…I’m suddenly not in a big rush to replace it.

Questions about the OptiGrill or any of the other products (IMUSA Electric Espresso Maker or WearEver Pure Living Bakeware) I talked about on GMA? Shoot me a comment.

Enjoy!

(Recipe below the photo slideshow)

This slideshow requires JavaScript.

Hanger Steak courtesy of Chef Marc Forgione and T-fal

Ingredients

For the Meat Marinade:

  • 1 cup chopped fresh curly parsley
  • 3 tablespoons minced shallot
  • 2 tablespoons chopped fresh rosemary
  • 1 tablespoon chopped fresh thyme
  • 1 garlic clove, minced
  • 1 teaspoon pink peppercorns, crushed
  • Extra-virgin olive oil
  • 1 Hangar Steak

For the Chimichurri Sauce:

  • 3/4 cup extra-virgin olive oil
  • 1/2 cup chopped fresh curly parsley
  • 1/2 cup chopped fresh cilantro
  • 3 tablespoons minced shallots
  • 1 tablespoons red pepper flakes
  • 1 tablespoon minced garlic
  • Kosher salt
  • 1/4 cup sherry vinegar

For the Grilled Vidalia Onions:

  • 1 Vidalia onion, cut into 1/2-inch thick rings
  • Olive oil
  • Kosher salt
  • Freshly ground black pepper

To Assemble the Dish:

  • Flaky sea salt, such as Maldon
  • Smoked salt
  • Freshly ground black pepper

Directions

Make the Steak:

Combine all herbs, shallots, garlic, and peppercorns in a small container and cover with enough EVOO to cover the herb mixture. Add steak and marinate overnight or up to one day ahead. Remove most of the marinade and grill on the OptiGrill on the Red Meat setting until your desired level of doneness. Remove to a clean plate, cover with foil and allow to rest at least five minutes.

Make the Chimichurri Sauce:

In a medium bowl mix together the olive oil, parsley, cilantro, shallots, pepper flakes, garlic, and salt. Cover and refrigerate for at least 2 hours or up to 1 day. Right before serving, add the sherry vinegar.

Make the Grilled Vidalia Onions:

While the steak is resting, toss the onions rings with some olive oil, salt, and black pepper. Grill the onions on the OptiGrill using the manual setting, until cooked through, 4 to 5 minutes. Finely chop the onions and combine with the chimichurri.

Place steak on serving plate and dust with smoked salt and freshly ground pepper. Place chimichurri sauce on top of the steak and lightly garnish with Maldon salt.

An Indian Food Four-Hour Feast

30 Aug
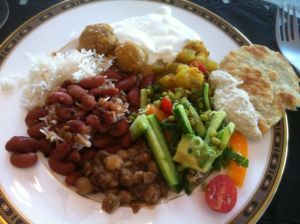
My finished, overloaded plate with all the goodies.

My finished, overloaded plate with all the goodies.

My sweet friend Meenakshi had a few friends over a few days ago for a cooking party. There was no big theme or reason, just a few hours of kitchen bliss.

No, really, we cooked for like four hours. It was amazing.

Meena, as she lets me call her now, invited me and the kids (although I left the little one at home; you’re welcome). School was just starting, and this would be a welcome distraction for my daughter, who was a little nervous about starting middle school. Plus, she kinda rocks in the kitchen, and this was no different.

Big Kid pouring the chilla, or savory pancakes

My Big Kid pouring out the chilla, or savory pancakes, onto the griddle.

The other guests included Meena’s lovely daughter-in-law, another blogger I hadn’t met, and a new instructor for Pulaski Tech’s newly-expanded culinary school I had only met in passing.

Our new group of friends gathered around to plate up our finished dishes.

Our new group of friends gathered around to plate up our finished dishes.

We were such the diverse group — different nationalities, religious beliefs and cultural traditions — and honestly, that’s what made it so awesome. In a world where people tend to yell to each other what they should be, we were able to cook and eat together, sharing things that were important to us.

For Meena, probably the most important sentiment shared was the food itself. Not only did the food reflect her own heritage, it screamed her own personal ethic:  cook at home. Whether it’s baked chicken or baba ghanoush, make it yourself. Your body will thank you.

And no, it doesn’t usually take four hours. We just enjoyed the process that much!

I’ll share a recipe or two from our dinner soon. For now, feast on the images and let me know in the comments below what a home-cooked meal means to you.

This slideshow requires JavaScript.

Lunch at Hanaroo a Hit with a Long Wait

24 Jun
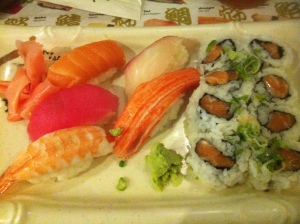
The sushi bento plate with salmon roll. No subs allowed on the nigiri, though.

The sushi bento plate with salmon roll. No subs allowed on the nigiri, though.

Ah, Hanaroo Sushi Bar. The legendary downtown Little Rock sushi joint, where dutiful workers run for a quick Asian repast during their all-too-short lunch breaks.

I’d heard a lot over the years, mostly good. But one thing I’d heard repeatedly was something about cockroaches. Hmmm.

This week, I am working in the office quite a bit more than usual (I’m usually part-time, teaching out of town), burning some end-of-fiscal-year hours. My office is at the 700 Main DHS complex, a quick walk from Capitol and the handful of business-friendly joints in that area. Today, I ventured out in search of food and remembered Hanaroo.

Well, actually, I had already diddled too long looking for somewhere to eat, hovering near Subway (had that last week), Sufficient Grounds (hopped in, but no obvious reference on the menu to lunch food until the sidewalk, on my way back out the other side), and oh yes…Hanaroo. So be it.

I was a little wary about the fact that they likely wouldn’t have any gluten-free soy sauce available, but I decided to risk it anyway. I needed to eat and get back to the office. At approximately 12:09 p.m., I was seated at the sushi bar, an appropriate place for loner diners like myself. Well, actually, I seated myself since nobody came to my aid and I didn’t know the protocol. They could use one of those “please wait for hostess” signs.

By 12:15, I had placed my order, and shortly after that I was presented my miso soup.

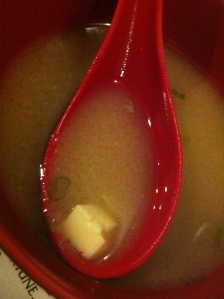
Tiny cubes of tofu made the miso soup even more fantastic.

Tiny cubes of tofu made the miso soup even more fantastic.

I love miso soup, y’all. It’s one of my favorite things. I know it’s glutinous and all that (likely containing wheat-laden soy), but I’m willing to take the fall now and then. Hanaroo’s miso soup was a little different, with a heavier texture (meaning they used more miso paste, which is good) and the addition of tiny little tofu cubes. The green onion slices were fresh and pungent, maybe even a little too strong and plentiful for my liking, but that’s just me.

The server came back to me. There are quite a few orders in front of you, she warned. It may be a little while. I nodded a faux agreement. What am I going to say at that point? Hope they’re not looking for me back at the office.

After a full 30 minutes of playing on Facebook and Twitter, my meal finally arrived. I had ordered the sushi bento lunch special, with a salmon roll and five pieces of nigiri. The diner chooses from five simple sushi rolls for this special, but the nigiri is take-it-or-leave-it: one each of tuna, salmon, crab, shrimp and snapper. At $8.95, including the soup or a salad, this is a heck of a deal.

My first bite into the salmon roll prompted one of those omigoshthisisawesome eye-roll-sigh things, where you look around and see if anyone saw you do it. What struck me was the texture of both the salmon and the rice. The salmon was silky and supple; the rice was distinctively fluffy, more tender and gently rolled than you usually get in these parts. Having watched Jiro Dreams of Sushi (which I highly recommend on Netflix), I wondered what special technique they used in cooking it. The sushi was dressed lightly with more of the green onions, which were more palatable here, for some reason.

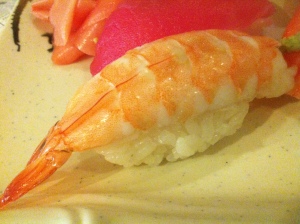
Shrimp nigiri. This one's for you, K-Shay.

Shrimp nigiri. This one’s for you, K-Shay.

I can’t say I had the same fantasmic experience eating the nigiri, but that has more to do with my lack of experience with some of the choices. I loved the tuna and salmon; the shrimp and snapper, meh. The crab was particularly troublesome because I’m pretty sure it was imitation. Imitation crab is made with wheat. Did you know that?

As not to be rude (and because my lack of experience with seafood was such that I wasn’t 100% sure it was fake), I ate the crab. I went back to work a blotchy hot mess, so I’m pretty sure my inkling was correct.

Overall, I must say that Hanaroo was a win, but don’t go in a hurry, or at least during the lunch rush. A quick review of online, er, reviews show a similar theme. It’s great, but don’t expect to be impressed with the facilities or the speed of service.

Oh, yes, the facilities! Walking up on the outside, one might question whether this is a restaurant or a seedy nightclub. Inside was just okay, not offensive but not sparkling, either.

At least I didn’t see any of the legendary cockroaches. Maybe next time.

Hanaroo Sushi Bar
205 W Capitol Ave
Little Rock, AR 72201
(501) 454-0599

Zesty Orange Quinoa Salad

24 May

At our house, we’re getting ready for Disney. In just 7 short days, we’ll be on our way to the Mouse and all the walking and such that will come with it.

Trying to get in better shape (and to detox from my recent sugar overload), I’ve been a really good girl in the food department the past week or two. And since I really love quinoa already, this tangy salad was an easy swap.

Concentrated orange juice is one of those things that I normally eschew, being basically concentrated orange-flavored sugar and all. But for this application, it works, giving a super-concentrated orange flavor without watering things down. If I had some of that frozen orange zest like we had in culinary school, it would be a worthy lower-sugar substitute. But these days, I am all for using what’s already in the house.

How do you like to prepare quinoa? Let me know in the comments.

Enjoy!

**************

Zesty Orange Quinoa Salad
Serves 2 as main dish, 4 as sides

  • 1 c. traditional (white) quinoa
  • 2 c. vegetable broth or water
  • 1 red bell pepper, diced
  • 1 green bell pepper, diced
  • 1 large head broccoli, cut into medium florets
  • 1 stalk celery, diced
  • 1/4 c. cider vinegar
  • 1/2 c. extra virgin olive oil
  • 1 T. frozen orange juice concentrate
  • 1 tsp. dijon mustard
  • 1 tsp. dry basil
  • 1/8 tsp. ground black pepper
  • 2 T. celery leaves, chopped
  • 1 T. fresh mint, minced (optional)

Cook quinoa according to the package directions, using the broth or water at a 1:2 proportion.

While the quinoa is cooking, prepare the vegetables. When all the vegetables are diced, put the peppers, broccoli and celery (not the leaves) in a microwave-safe bowl with a few tablespoons of water. Cover the bowl and microwave on high, stirring occasionally, for 2-3 minutes or until the broccoli is bright green. Strain out the water. If you prefer not to use the microwave, you can blanch and shock the vegetables by boiling water, cooking the vegetables for about a minute, then straining them and rinsing with cold water.

Prepare the dressing in a small jar or other container with a lid. Place the vinegar, olive oil, orange juice concentrate, mustard, dry basil and black pepper in the jar, cover the jar and shake well.

When the quinoa is done and still warm, fold in the veggies, celery leaves and mint if using. Fold in as much dressing as you like, being careful not to crush the quinoa.

Serve warm or chilled, either alone or mixed with salad greens. No further dressing is needed.